This is another late post, this picks up the day after my last one...
A glimpse and total internal combustion fail.
Thursday night I start back into the motor after the big bang and now stuck motor. I wasn't felling too bad about the work, I figured it was going to be something easy or something that was going to have me miss the race on Saturday. With my fingers crossed hoping for something simple I drained the tank, then pulled the tank and seat. When I pulled the exhaust I heard metal in the pipe, game over for racing in the near future.
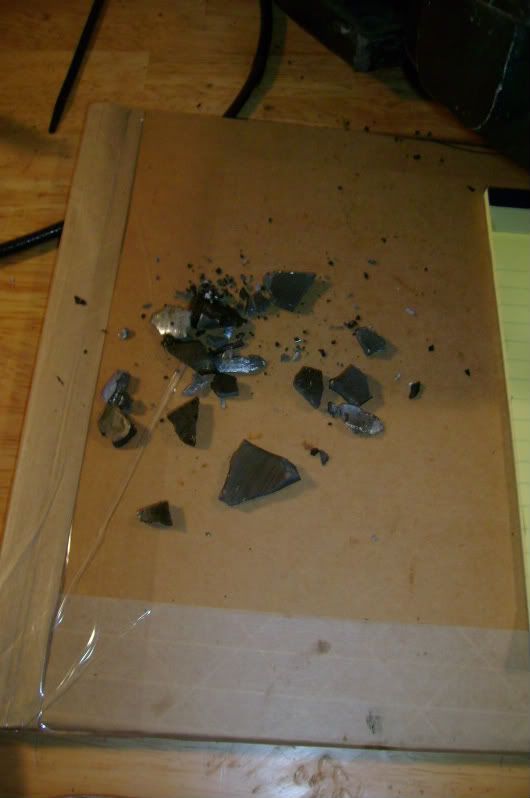
Chunks of piston and sleeve that dumped out of the pipe.
For those who do not know, metal chunks in the exhaust means the motor grenadeed itself. I dump a small pipe of metal out of the pipe and onto the workbench, I can see it has chunks of the sleeve not just the piston in the pile. Pulling the head it did not look too bad, then the fun of removing the cylinder came.
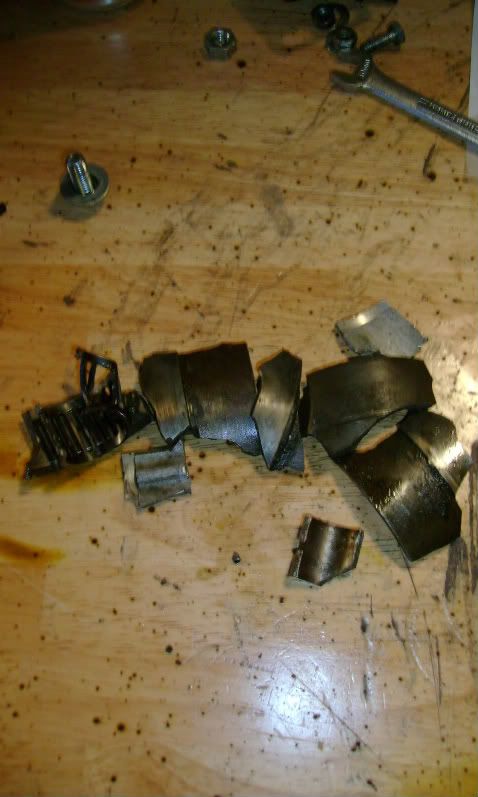
Chunks I picked out of the motor itself, some piston, sleeve and connecting rod...
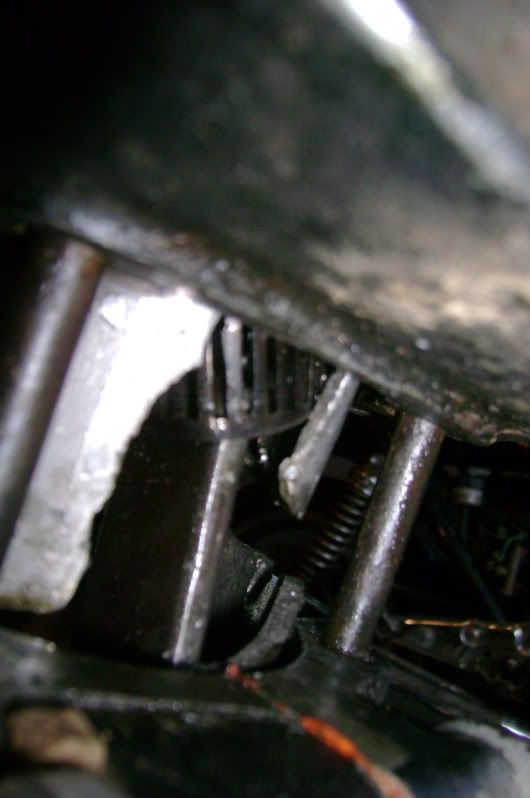
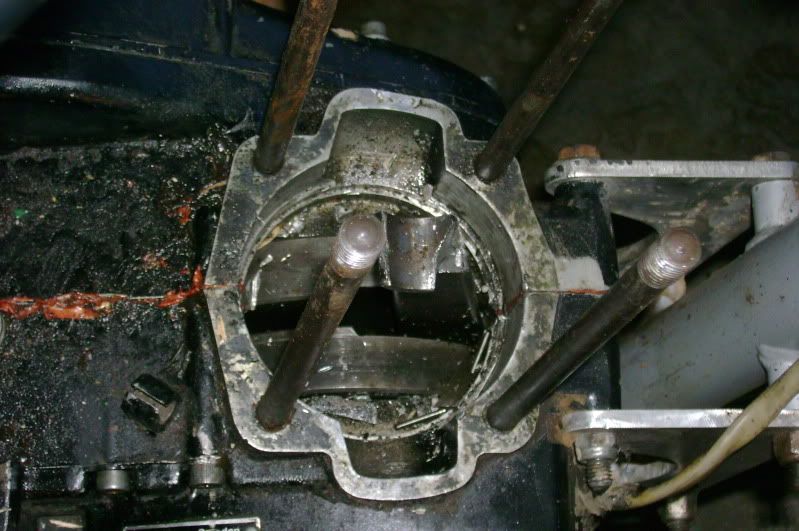
I should have been able to just lift the cylinder off of the motor, but then again if I was able to do that the motor would not have been seized either. A quick change in music (from Cake to Rammstein) fit the change from race prep to an autopsy. The industrial music fit a lot better with the big dead blow hammer that was needed to force the cylinder and piston apart. As the piston and the cylinder started to separate I was able to see the damage, and what most likely was the cause.
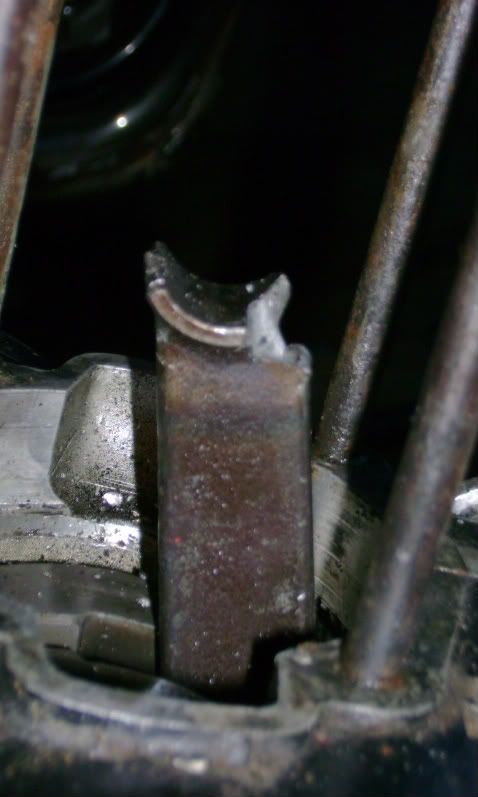
Broken conrod...
The crank with lots of crap still stuck to it, it will wait until I split the cases for proper clean up.
After I was able to get the topend off, the piston was still stuck in the bore and needed to be hammered out...
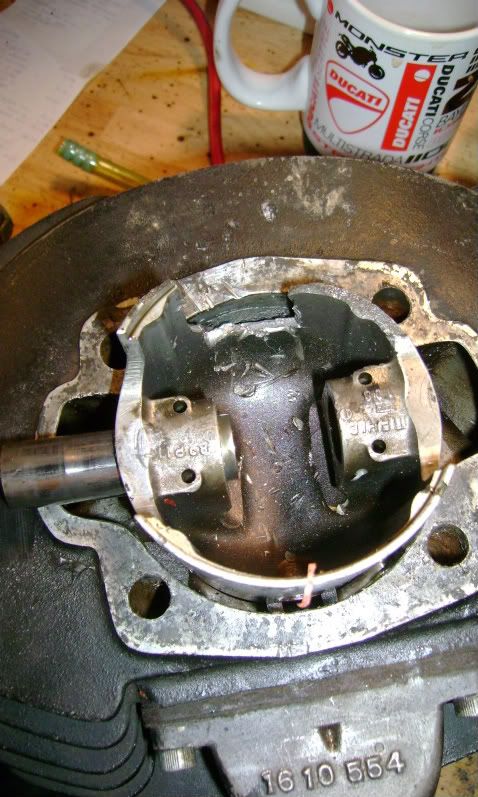
All said and done the piston has the better part of it's skirt broken off, the connecting rod broke where the wrist pin goes through it, and the sleeve had large chunks of it shattered off of it. I think the pictures tell the tail pretty well.

A glimpse and total internal combustion fail.
Thursday night I start back into the motor after the big bang and now stuck motor. I wasn't felling too bad about the work, I figured it was going to be something easy or something that was going to have me miss the race on Saturday. With my fingers crossed hoping for something simple I drained the tank, then pulled the tank and seat. When I pulled the exhaust I heard metal in the pipe, game over for racing in the near future.

Chunks of piston and sleeve that dumped out of the pipe.
For those who do not know, metal chunks in the exhaust means the motor grenadeed itself. I dump a small pipe of metal out of the pipe and onto the workbench, I can see it has chunks of the sleeve not just the piston in the pile. Pulling the head it did not look too bad, then the fun of removing the cylinder came.

Chunks I picked out of the motor itself, some piston, sleeve and connecting rod...
I should have been able to just lift the cylinder off of the motor, but then again if I was able to do that the motor would not have been seized either. A quick change in music (from Cake to Rammstein) fit the change from race prep to an autopsy. The industrial music fit a lot better with the big dead blow hammer that was needed to force the cylinder and piston apart. As the piston and the cylinder started to separate I was able to see the damage, and what most likely was the cause.

Broken conrod...

The crank with lots of crap still stuck to it, it will wait until I split the cases for proper clean up.

After I was able to get the topend off, the piston was still stuck in the bore and needed to be hammered out...
All said and done the piston has the better part of it's skirt broken off, the connecting rod broke where the wrist pin goes through it, and the sleeve had large chunks of it shattered off of it. I think the pictures tell the tail pretty well.
In my best judgment the cause of this terminal failure of the motor was largely due to the missing base gasket. It turns out the last person to assemble this motor decided that it was not needed or something. That is not to say the carburetor jamming open didn't contribute to the problem, but I think most engines would have been able to run at WFO for 5 seconds or so without failing. The missing gasket would have cause the bike to run very lean, which would explain the failure during warm-up at the last race as well. The big kick in the pants on this one is I almost pulled the cylinder off when I was doing the timing to replace the base gasket, but decided to save it and use it for when I planned on rebuilding the motor over the winter.
The parts hunt is now on, and turning out to be a bit of a pain. I found the parts and it looks like it will cost me a little under a grand to get all of this fixed. This will have to wait for other things in my life to get sorted before I can blow the cash. I am not going to enjoy this, but I am reminding myself that even after I dump the correct amount of money into it I will still have less into it than I would have spent to get a race ready bike.


